To do the watermelon nail art you will need:
- a green nail polish
- a pink or a red nail polish
- a white or a black nail polish
- one toothpick
- a piece of paper
First of all, apply a base coat on all your nails and let it dry.

Step 1: Apply a pink or a red nail polish, I prefer pink. BUT don't polish your whole nail, leave the top space open and let it dry.

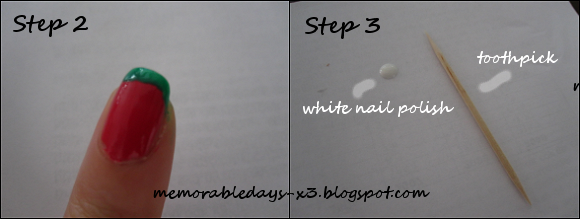
Step 2: Apply a green nail polish at the top of your nails and let it dry.
Step 3: Put a bit nail polish on your piece of paper and dip your toothpick in it. And then you can put some small dots on your nails (just like the pits in watermelons) Repeat this routine on every nail. You can use white or black nail polish.

Step 4: Let it dry and apply a top coat on it. And you're done :)
I've used the C&B pink nail polish, Cui Nong professional green nail polish and the white nail polish of Dear' Lee.
I hope this tutorial was helpful ^-^, if you have any questions, feel free to ask! xoxo.

Hehe so cute but still easy! Good tutorial for a noob like me...I have no idea what I'm doing when it comes to nails lol =_=''
ReplyDeleteaah fabolously creative! I like it
ReplyDeleteHow cute! Thanks for the tutorial, it's very detailed. :)
ReplyDeleteNice =) love your tutorial. It's so cute ^^
ReplyDeleteYour nails look neat and super cute! :) i will definitely be giving the water melon look a go!
ReplyDeleteC.C.C
http://christinecocochanel.blogspot.com/
xxx
thank you sweeties ^__^!
ReplyDeleteCreatieeef!
ReplyDeleteIk zie dat je ook van nail art houd, me too :D
x